Thursday, September 12, 2013

Splat Lightening Kit & Nice'n Easy 103 A Part 1


If you saw my last post, I decided against trying that red. Since the last time I dyed it red it failed horribly. I splurged at Walgreens and bought all of these:


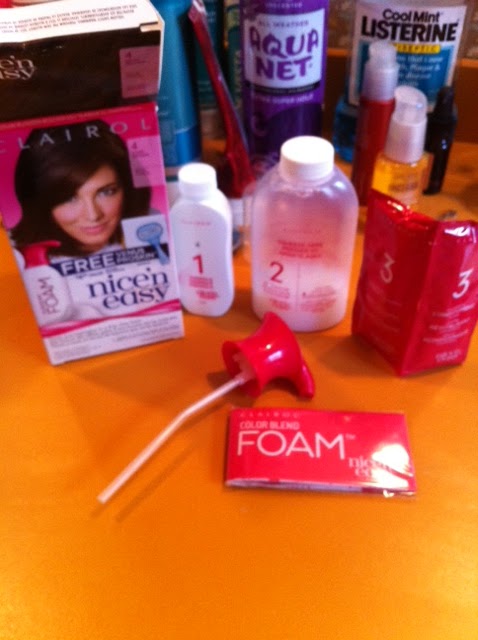
I've heard really good things about the Splat brand in general, and really great things about the bleach they make. Ok, I bought the Super Blonde by Loreal as a backup in case I REALLY need another bleach. I'm keeping the receipt because I don't think I'll actually need it. Last, the Nice'n Easy Medium Neutral Blonde as it's called, looked awesome. I want a cool ashy blonde. 

My current hair color is... brownish red? The red tint stayed after multiple color oop'sing after the last time I dyed it. The roots are a lot lighter than the length of my hair.


As a precaution to the inevitable damage that will happen to my hair I got these:

Redken brand is known as one of the best, and most salons use their products. This shampoo by them claims it can soften the damage and help rebuild hair, which I believe because it has protein in it. 
The second thing is an argan oil deep treatment. It strengthens, and prevents further breakage. 
The third is John Frieda full repair conditioner, which got good reviews.
Last is Aussie's 3 minute miracle, which is known as an inexpensive great repairing conditioner.

I have 2 days of off work in a row so I wanted to get started as quickly as I could! Here we go!

Well, my first impression of Splat is that they didn't give enough bleach. I have shoulder length hair and  didn't have enough to go over some parts of my head. I don't even have super thick hair. I'm glad I bought the second bleach kit.

This is my hair after using Splat:


It did lighten my hair, and yeah, mostly to a light gingery color, but I did dye my hair red a while ago, so I expected this. Most of my roots are blonde, but there are patches of brown where, as I said, I couldn't really go over because there wasn't as much product as I thought there'd be. 

Next up: The Born Blonde hair bleach:

That stuff is great. There is a significant increase in the amount of product you get, and it is less expensive than Splat. I also prefer the consistency. It is more of a non drip creme, and Splat is more of a liquid.

I ended up dumping a lot of the Born Blonde down the drain because they really do give a lot of product, but it is great knowing that you can completely cover your head and get all the spots you need to.

Tip: Whether or not you use all of the bleach, wash out the container before you throw it out. It is possible for pressure to build up and the bottle to blow.

The following pictures are after the second bleaching. I'm super fluffy.


My hair here is a strawberry blonde! It isn't bad, but I really want the reddish orange out. For that I won't bleach or dye, I'll turn to my Jhirmack brand purple shampoo. Instead of jumping in the shower and using it, I just make my hair damp, put the shampoo on, and wrap my head in a towel. It says on the directions to rinse after 2 minutes, but I usually leave it on for upwards of 30 minutes. It is a miracle shampoo that really does get rid of orangeness the more you use it. 

I used this stuff back when I ombre'd my hair. 

This is day 1, tomorrow I will take more of the orange out of my hair and actually dye it with the Nice n Easy color. 

Monday, September 9, 2013

Redhead Part 2?

So, I'm not exactly sure what color my hair is right now. After the horrible experience I had with the Vidal Sassoon dye, I Color Oops'd my hair either 2 or 3 times afterwards to make it look better. The length and ends of my hair are a brownish red, which is fine, but the roots are a significantly lighter reddish color.

I've been dealing with it for a few weeks because it honestly isn't that bad, but the thing that bothers me the most is the roots being so much lighter. I'm not completely set on what my plan is next for my hair, but I still really want to be a redhead. I had great vibrant red hair years ago, it was professionally done and cost me a mint. I really don't like going to the salon to get my hair dyed. Yeah, it's more convenient, but I've had so many bad experiences at salons, mostly with haircuts, that I try to avoid them. Plus, I think its fun to dye your own hair.

Anyways, there are several Garnier Nutrisse box dyes specifically made for naturally dark hair. Most of them are nice reds too. This one is the one I'm seriously considering, the results that I've seen have been a beautiful bright red shade:

Later this week I have 2 days off in a row. I think that's when I'll go for it!

Friday, August 16, 2013

From Brunette to Redhead!

I've been a redhead before, and it was the look I got the most complements on. Everyone loves red hair! I've missed it and want to try to go back. I currently have had dark brown hair, which is my natural color, but I had to dye it to get it back.

Today I'm trying a product I've never used before: Color Oops!

Previously when I've gone from black to light brown hair I've used a combination of Rusk's Elimin8, and Manic Panic's Flash Lightning.

The red dye I've chosen is also from a brand I've never used, but had solid reviews: Vidal Sassoon's Pro Series.


The red is '5RR' which is a beautiful, vibrant dark red. I know very well that red hair fades the fastest, I read reviews for this shade where multiple people state that it didn't fade nearly as fast as other reds. 

Color Oops: It smells. Which shouldn't sway you from buying it, but it smells bad. They include a plastic cap, which is great, because the consistency is not what I expected. It is pretty watery and runny. I have shoulder length hair and I questioned if I would be able to cover my entire head with the product, but it turns out it was just enough. If you have anything longer than shoulder length hair, you'll need 2 boxes. 

Before Color Oops: 
Dark Brownish Black Hair! 

After Color Oops:
Holy crap.. my natural hair color!!
Also, excuse my fluffy hair. I have naturally insanely curly hair!

I DID NOT EXPECT COLOR OOPS TO WORK!! I had literally forgotten what my natural hair color had looked like, I have been dying my hair since I was 13. When I got out of the shower I was swearing with excitement! I was really skeptical about this product, but now I am a massive supporter! I could literally go on for hours about how well this worked! But I realize I need to shut up and get to the actual redhead part. 

Vidal Sassoon 5RR: The steps are easy, combine bottle 1 with 2 and shake. When I was putting the dye [bottle 1] into bottle 2, the bottle got a hole in it and it took me 3x as long to put the dye in. It was also extremely messy. So, If you buy this brand, be careful on this step. 

When combined the dye is really creamy, and it doesn't drip. However, I barely had enough dye to cover my head. I don't have long hair at all. Using other brands, I ALWAYS have extra dye that ends up being thrown away, there was literally no extra dye this time. 

That being said, this dye is horrible. Horrible horrible horrible.

My hair was very light after using color oops, light enough to definitely get a solid red color, but here is what happened:

From far away it looks deep brown, if you stand under a light and look closely it is super dark red.
I understand that dye goes on dark at first and lightens with washes, so later that night I washed my hair a few times and although a ton of dye kept coming out, it made no difference. The worst part was the two toned-ness of my hair. This is what my roots looked like:


My roots were a nice vibrant red! It looked like my scalp was bleeding compared to my hair.
I also dyed my hair about 2 hours before I had to go to work, and didn't have time to fix it. So I put my hair up and wore a giant headband.

I got off work at midnight and drove to a 24/7 Walgreens for another box of handy dandy Color Oops!

So my hair now looks pretty much the same after the first time I Color Oops'd it. The roots are a little bit lighter. But I'm going to live with it and stop messing with my hair for a while!

Tips:
Although the box of Color Oops says you can recolor the same day, I wouldn't do that. I recolored 2 days later. Your hair colors better when it is dirty, because of the oils in your hair. Also, after using Color Oops my scalp was a bit sensitive. It was broken or damaged, just a little sensitive. 

I wouldn't recommend Vidal Sassoon. Not only did the dye not work for me, it was incredibly messy. My bathroom looked like a crime scene, my skin was covered in dye that was really difficult to remove,  one of the bottles I needed to combine with another ripped and made it difficult to combine the 2 bottles.

The 1 good thing that came out of this was discovering Color Oops and how much of a miracle product it is, even though the packaging looks like its from the 90's. 


Monday, May 6, 2013

Nice 'n Easy Foam hair dye review

Well I did it. I dyed my hair dark again. I feel more like myself when my hair is dark, it is like a security blanket. I did like my ombre hair, but I didn't love it enough to keep it.

ANYWAY!
When I know the color I want to dye my hair, I look up video reviews and tutorials on youtube. I'd never tried foam hair dyes because I'd always thought they were a joke. How could a foam completely cover your hair? Well, they actually work great. I'm surprised.

This is what I bought:
This is what the inner contents look like:
It is very straight forward. Combine 1 &2, mix gently, attach foam cap. It isn't a pump top, you squeeze the bottle, I had zero issues with it.

Before:

After:

I'm happy. I'm expecting it to fade more the the actual dark brown after a few washes, but I love it. My suggestion with any foam dye is to be very thorough. With regular dyes, you can tell where you have covered because the liquid is heavy. The foam is very light, it does turn liquid-y when you work it in, but I had to go back a few times and cover patches I had missed.

I recommend foam dyes, I didn't expect that!

Tuesday, April 23, 2013

Here we go again?

I need help. Mental help. So, before my ombre hair adventure I had black hair for a couple years. I've always loved my hair when it is dark. There is something about it that boosts my confidence. I've had my ombre hair now for a few months and I love it. I really do, but Pinterest has ruined my life and I keep seeing pictures of beautiful dark hair and now I'm feeling the urge to darken my hair again. Not to black, but to a dark brown with black lowlights. I'm not exactly sure how to make black lowlights a thing on my hair, but thats what the caption said for this amazing hair picture:


Should I or shouldn't I? HELP ME!!

Friday, April 12, 2013

ImPress- Press on manicure review


I never really buy press on nails, but my friend & I decided to get matching nails for work. I've seen ads for imPress & a coworker had positive things to say about it, so here we go. Now, they do not require nail glue, but my friend used it with hers because it will make them last longer. I'm all for that, especially because these are about $7.99 or so.

After:

They give you a lot of size varieties, which is smart, but I do suggest getting nail glue if you want it to last a while. It is sticky, but I could already tell if you scratch your nail against something, there is a good chance it would come off. They are gaudier than I normally like my nails, but since I'm doing this with a friend, I can handle it. It is a good product, I just wish it was less expensive. 

UPDATE: About an hour later, the length of the nails were driving me insane. If this happens to you too, I suggest you take nail clippers and shorten them. I was worried that would split the nail and ruin it, but it clipped like a regular nail. I'm much happier now.

Friday, April 5, 2013

Nails of the Week

It's a Nails inc. kind of week.

Everytime I go into Sephora I find myself gravitating towards Nails inc. polishes. They have a large variety including the best spring colors I've seen so far. The polish on the right is their 45-second drying top coat, which actually does dry in that time. The 3D glitter on the left is my favorite glitter polish I own, it equally distributes the glitter in each stroke, so 10 coats aren't needed to actually make your nail glittery!

Finished result: 
The picture makes the blue appear paler than it is, but voila!

Products:
Blue Polish- Chelsea physic garden
Glitter- Maida vale
Top Coat- Kensington topcoat caviar

^Those weird names are the ones listed on the bottom of the bottle